tkPointerSettings - a Tk GUI 'wrapper' for the 'xinput' command
uniquename - 2013aug08
In a 'done-and-planned' contributions section near the bottom of my 'bio' page at uniquename, I had a project listed to build a Tk GUI for mapping mouse buttons --- in particular, a Tk 'wrapper' for the 'xinput' command (on Linux/Unix/BSD systems). I had that 'to-do' item in the 'CSU' group, where 'SU' denotes 'Selector Utilities'.
I have addressed that item on my 'to-do' list, and the code and sample image(s) are below.
In the process of creating the GUI (and in the process of re-mapping some buttons on a couple of my computer mice), I found that I needed to implement several variations of the 'xinput' command:
- xinput list
- xinput test <deviceID>
- xinput get-button-mappings <deviceID>
- xinput set-button-mappings <deviceID> <Map-list>
The controls for re-mapping 'pointer device' functions to the various 'buttons' (or 'protuberances' or 'wires') of the device evolved during the coding and testing, and I ended up with the GUI seen in the following image.
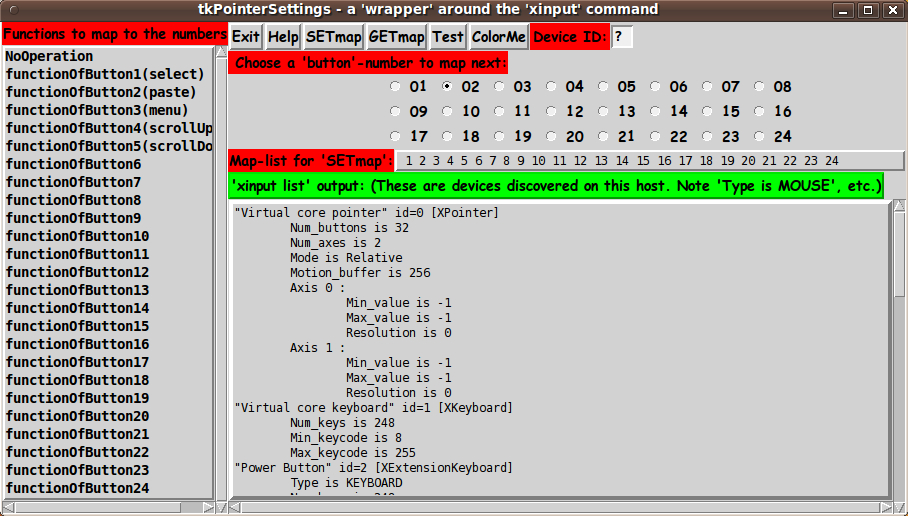
In this image, the labels colored red draw attention to the items that need to be addressed (or used) in re-mapping 'wires' of a 'pointer device'.
And the green label indicates the output from the 'xinput list' command that executes when the GUI is started up.
Some of the typical uses of this GUI are
** To switch the functions of mouse buttons 1 and 3, for left-handed users.
** To deactivate the 'paste' function of mouse-button 2 --- for users of a mouse with scroll-wheel --- when pressing down too hard on the scroll-wheel causes an unwanted paste operation.
** To deactivate the 'scroll' functions of the scroll-wheel --- so that the wheel can be used just for the 'paste' function, without accidentally scrolling a window while doing the paste.
** To assign buttons 6 and/or 7 (on a scroll-wheel mouse with extra buttons) so that the 'paste' operation can be done with one or both of the additional buttons.
(For a scroll-wheel mouse whose scroll-wheel can be tilted left or right and thus send signals using 'buttons' 6 and 7, one might assign buttons 8 and/or 9 the 'paste' function.)
The 'Help' button on the GUI provides pretty complete and detailed help for using the GUI.
Here is the main 're-mapping guidance' from the Help:
GUI FEATURES and OPERATION NOTES:
The **DeviceID ENTRY FIELD** is used to specify a device number for the user's pointer device.
The DeviceID can often be determined simply by looking at the **output of the 'xinput list' command**, which is shown in a **SCROLLABLE TEXT** area on the GUI.
Sometimes it is not enough to look for a string like 'Type is MOUSE' or 'Type is TOUCHPAD' in the text area to find the DeviceID number after an 'id=' string. And sometimes there is not a distinguishing 'device name', like 'USB Optical Mouse' nor a manufacturer name like 'Logitech' followed by a word like 'Mouse'.
Also, if the user plans to assign a function to a button (or other 'protrusion' or 'wire' of the pointer device), it may not be clear what number that 'button' has been assigned.
In those cases, it is helpful to put a GUESS at a DeviceID number in the DeviceID entry field, and click on the ** 'Test' BUTTON **. Then a window pops up and for any motion of the mouse/pointer-device and for any action, like a button press, text will appear in the 'Test' window to indicate the event. Button presses, anywhere on the desktop, will show a button number. Hence you can determine button numbers for 'protuberances' on the pointer device.
Once you determine the DeviceID and have it entered in the DeviceID field, you can press the ** 'GETmap' BUTTON ** and the command
xinput get-button-map <DeviceID>
will be run and the output will show up in the text area to the right of the 'Map-list' label on the GUI.
To change a number in the 'Map-list' string, click on a RADIOBUTTON of the GUI, to choose a position number, from 1 to 24.
Then click on a line of the Functions LISTBOX, to assign that function to the chosen position in the Map-list string. The Map-list should immediately update on the GUI.
For example, a left-handed user might click on RADIOBUTTON 1 and click on 'functionForButton3(menu)' in the LISTBOX. Then they would click on RADIOBUTTON 3 and click on 'functionForButton1(select)' in the LISTBOX.
When the user has set the Map-list string as desired, they click on the ** 'SETmap' BUTTON ** on the GUI, which runs the command
xinput set-button-map <DeviceID> <Map-list>.
The change to the actions of the pointer device should take effect immediately. The user can test this out by doing 'paste' operations or 'select' operations (or whatever) from/to/in various X-windows of the user's desktop.
The code
Below, I provide the Tk script code for this 'tkPointerSettings' utility.
I follow my usual 'canonical' structure for Tk code for this Tk script:
  0) Set general window & widget parms (win-name, win-position,
     win-color-scheme, fonts, widget-geometry-parms, win-size-control,
     text-array-for-labels-etc).

  1a) Define ALL frames (and sub-frames, if any).
  1b) Pack   ALL frames and sub-frames.

  2) Define & pack all widgets in the frames, frame by frame.
              Within each frame, define ALL the widgets.
              Then pack the widgets.

  3) Define keyboard and mouse/touchpad/touch-sensitive-screen action
     BINDINGS, if needed.

  4) Define PROCS, if needed.

  5) Additional GUI initialization (typically with one or more of
     the procs), if needed.
This Tk coding structure is discussed in more detail on the page A Canonical Structure for Tk Code --- and variations.
This structure makes it easy for me to find code sections --- while generating and testing a Tk script, and when looking for code snippets to include in other scripts (code re-use).
I call your attention to step-zero. One new thing that I have started doing recently is using a text-array for text in labels, buttons, and other widgets in the GUI. This can make it easier for people to internationalize my scripts. I will be using a text-array like this in most of my scripts in the future.
Experimenting with the GUI
As in all my scripts that use the 'pack' geometry manager (which is all of my 100-plus scripts, so far), I provide the four main pack parameters --- '-side', '-anchor', '-fill', '-expand' --- on all of the 'pack' commands for the frames and widgets.
That helps me when I am initially testing the behavior of a GUI (the various widgets within it) as I resize the main window.
I think that I have used a nice choice of the 'pack' parameters. The labels and buttons and radiobuttons stay fixed in size and relative-location as the window is re-sized --- while the scrollable listbox and scrollable text widgets (along with their x and y scrollbars) expand/contract appropriately if the window is re-sized.
You can experiment with the '-side', '-anchor', '-fill', and '-expand' parameters on the 'pack' commands for the various frames and widgets --- to get the widget behavior that you want.
___
In addition, you might want to change the fonts used for the various GUI widgets. For example, you could change '-weight' from 'bold' to 'normal' --- or '-slant' from 'roman' to 'italic'. Or change font families.
In fact, you may NEED to change the font families, because the families I used may not be available on your computer --- and the default font that the 'wish' interpreter chooses may not be very pleasing.
I use variables to set geometry parameters of widgets --- parameters such as border-widths and padding. And I have included the '-relief' parameter on the definitions of frames and widgets. Feel free to experiment with those 'appearance' parameters as well.
Some features in the code
That said, here's the code --- with plenty of comments to describe what most of the code-sections are doing.
You can look at the top of the PROCS section of the code to see a list of the procs used in this script, along with brief descriptions of how they are called and what they do.
The main procs involve use of the 'xinput' command. Here are the proc names and the form of the 'xinput' command that is executed --- preceded by the button name that calls on the proc.
For the 'SETmap' button, the proc 'xinput_setmap' executes:
exec /bin/sh -c "/usr/bin/xinput set-button-map $deviceID $NUMSstring"
For the 'GETmap' button, the proc 'xinput_getmap' executes:
set NUMSstring [exec /usr/bin/xinput get-button-map $deviceID]
For the 'Test' button, the proc 'xinput_test' executes:
   exec xterm -hold -fg white -bg black -e \
      /usr/bin/xinput test $deviceID
And 'xinput list' is executed within the proc 'init_xinput_parms_array', which is called in the 'Additional GUI Initialization' section at the bottom of the script.
The proc 'rebuild_xinput_parms' is executed whenever a line in the listbox is clicked --- to rebuild the 'Map-list' text string of integers that is shown on the GUI.
It is my hope that the copious comments in the code will help Tcl-Tk coding 'newbies' get started in making GUI's like this.
Without the comments, potential young Tcler's might be tempted to return to their iPhones and iPads and iPods --- to watch videos of dogs-gone-wild, chasing their own tails.
Code for the Tk script 'tkPointerSettings.tk' :
#!/usr/bin/wish -f
##
## Tk SCRIPT NAME: tkPointerSettings.tk
##
##+#######################################################################
## PURPOSE: This Tk GUI script provides a GUI wrapper for the
## 'xinput' command --- to use 'xinput' to change (or
## assign) functions of buttons of a mouse or other
## 'pointer' device.
##
## The GUI supplies radiobuttons and other widgets that
## allow the user to change functions of (or assign functions
## to) the various buttons/'features' of a 'pointer device'.
##
## Here 'feature' is meant to represent an action that
## is performed by other than a button press --- such as
## a tilt (right or left) of the scroll-wheel.
##
## And 'pointer device' is meant to convey that this
## wrapper script can apply to devices other than computer
## mice --- devices such as touchpads or game 'pad' controllers.
##
## Some of the typical uses of this GUI are
## 1) To switch the functions of mouse buttons 1 and 3,
## for left-handed users.
## 2) To deactivate the 'paste' function of mouse-button 2,
## for users of a mouse with scroll-wheel, when pressing
## down too hard on the scroll-wheel causes an unwanted
## paste operation.
## 3) To deactivate the 'scroll' functions of the scroll-wheel,
## so that the wheel can be used just for the 'paste' function,
## without accidentally scrolling a window while doing the paste.
## 4) To assign buttons 6 and/or 7 (on a scroll-wheel mouse with
## extra buttons) so that the 'paste' operation can be
## done with one or both of the additional buttons.
##
##+###########
## GUI DESIGN:
##
## The GUI includes
##
## 1) a SCROLLING LISTBOX from which to choose a function to assign
## to a button/'feature' of the 'pointer device'
##
## 2) a set of at least 24 RADIOBUTTONS, to represent the
## buttons/'features' of the pointer device
##
## 3) a TEXT widget in which to show the current parameter settings for
## the 'xinput' command
##
## 4) another SCROLLABLE TEXT widget, in which to show the results
## of an initial 'xinput list' query
##
## 4) BUTTONS, such as 'Exit', 'Help', and 'SetMap'. Clicking on the
## 'SetMap' button causes the 'xinput' command to execute, using
## the current button-assignment settings.
##
##+########################################################################
## 'CANONICAL' STRUCTURE OF THIS CODE:
##
## 0) Set general window parms (win-name,win-position,win-color-scheme,
## fonts,widget-geom-parameters,win-size-control,text-for-labels-etc).
## 1a) Define ALL frames (and sub-frames).
## 1b) Pack ALL frames and sub-frames.
## 2) Define & pack all widgets in the frames, frame by frame.
##
## 3) Define key and mouse/touchpad/touch-sensitive-screen action
## BINDINGS, if needed.
## 4) Define PROCS, if needed.
## 5) Additional GUI INITIALIZATION (typically with one or two procs
## from section 4), if needed.
##
##+#################################
## Some detail on the code structure of this particular Tk script:
##
## 1a) Define ALL frames:
##
## Top-level : 'fRleft' and 'fRright'
##
## Sub-frames of 'fRleft': none, just one listbox with scrollbar(s)
##
## Sub-frames of 'fRright' (top to bottom):
##
## - 'fRbuttons' for buttons: Exit, Help, SETmap, GETmap, Test, ColorMe
## - 'fRradbutts0' for a label for radiobuttons
## - 'fRradbutts1' for about 8 radiobuttons
## - 'fRradbutts2' for about 8 more radiobuttons
## - 'fRradbutts3' for about 8 more radiobuttons
## - 'fRxinputparms' for a text widget (holding 'xinput' parms)
## - 'fRxinputlist' for a scrollable text widget (holding
## output from 'xinput list')
##
## 1b) Pack ALL frames.
##
## 2) Define & pack all widgets in the frames -- basically going through
## frames & their interiors in left-to-right, top-to-bottom order:
##
## 3) Define bindings: none currently
##
## 4) Define procs:
##
## - 'loadfuncs2listbox' - for loading a set of GUI initialization
##
## - 'show-select_func_in_listbox' - for a binding on the listbox
##
## - 'xinput_setmap' - to 'exec' an 'xinput' command, when the
## 'SetMap' button is clicked
##
## - 'getset_bkgdcolor' - for ColorMe button (gets Rpal255,Gpal255,Bpal255 via
## a separate color-selectorGUI with 3 slider
## bars, then sets the GUI 'palette')
##
## 5) Additional GUI initialization: run 'loadfuncs2listbox'
##
##+#######################################################################
## DEVELOPED WITH: Tcl-Tk 8.5 on Ubuntu 9.10 (2009-october, 'Karmic Koala')
##
## $ wish
## % puts "$tcl_version $tk_version"
##
## showed
## 8.5 8.5
## but this script should work in most previous 8.x versions, and probably
## even in some 7.x versions (if font handling is made 'old-style').
##+########################################################################
## MAINTENANCE HISTORY:
## Started by: Blaise Montandon 2013aug06 Started development, on Ubuntu 9.10,
## for personal use and for donation
## of this script to wiki.tcl.tk.
## Changed by: Blaise Montandon 2013aug25 Set aRfuncs4butts array in proc
## 'init_xinput_parms_array'
## manually, for a Logitech M500
## corded mouse to change buttons 8
## and 9 to paste and de-activate
## the paste function of button 2.
## Changed by: Blaise Montandon 2013sep08 1) Added initialization-overrides
## for a Logitech G300 mouse to
## proc 'init_xinput_parms_array'.
## 2) Added code to 'xinput_getmap'
## to update array 'aRfuncs4butts'
## in addition to setting the
## 'NUMSstring' var that shows on
## the GUI.
##+#######################################################################
##+#######################################################################
## Set WINDOW TITLES and POSITION.
##+#######################################################################
wm title . "tkPointerSettings - a 'wrapper' around the 'xinput' command"
wm iconname . "tkPointer"
wm geometry . +15+30
##+#######################################################################
## SET COLOR SCHEME (palette) FOR THE WINDOW.
##+#######################################################################
## and
##+#######################################################################
## SET BACKGROUND COLOR vars FOR WIDGETS, like ENTRY & LISTBOX widgets.
##+#######################################################################
## Set a Gray palette for the GUI.
##
set Rpal255 210
set Gpal255 210
set Bpal255 210
set COLOR_pal [format "#%02X%02X%02X" $Rpal255 $Gpal255 $Bpal255]
tk_setPalette $COLOR_pal
set listboxBKGD "#f0f0f0"
set entryBKGD "#f0f0f0"
set radbuttBKGD "#f0f0f0"
set hiliteBKGD "#ff0000"
set hilite2BKGD "#00ff00"
##+#######################################################################
## SET FONT VARS for use in the 'font create' statements below.
##+#######################################################################
set guiFONTsize 14
set guiFONT_SMALLsize 12
## For variable width:
set FONT_varwidth \
" -family {comic sans ms} -size -$guiFONTsize -weight bold -slant roman "
set FONT_SMALL_varwidth \
" -family {comic sans ms} -size -$guiFONT_SMALLsize -weight normal -slant roman "
## For fixed width:
set FONT_fixedwidth \
" -family {dejavu sans mono} -size -$guiFONTsize -weight bold -slant roman "
set FONT_SMALL_fixedwidth \
" -family {dejavu sans mono} -size -$guiFONT_SMALLsize -weight normal -slant roman "
##+#####################################################################
## DEFINE (temporary) FONT-NAMES using 'font create'.
## The font names are to be used in '-font' widget specs below ---
##+#####################################################################
eval font create fontTEMP_button $FONT_varwidth
eval font create fontTEMP_label $FONT_varwidth
eval font create fontTEMP_varwidth $FONT_varwidth
eval font create fontTEMP_entry $FONT_fixedwidth
eval font create fontTEMP_listbox $FONT_fixedwidth
eval font create fontTEMP_text $FONT_fixedwidth
# eval font create fontTEMP_msg $FONT_fixedwidth
eval font create fontTEMP_SMALL_button $FONT_SMALL_varwidth
eval font create fontTEMP_SMALL_label $FONT_SMALL_varwidth
eval font create fontTEMP_SMALL_varwidth $FONT_SMALL_varwidth
eval font create fontTEMP_SMALL_entry $FONT_SMALL_fixedwidth
eval font create fontTEMP_SMALL_listbox $FONT_SMALL_fixedwidth
eval font create fontTEMP_SMALL_text $FONT_SMALL_fixedwidth
# eval font create fontTEMP_SMALL_msg $FONT_SMALL_fixedwidth
##+#######################################################################
## SET GEOM VARS FOR THE VARIOUS WIDGET DEFINITIONS.
## (e.g. padx,pady for Buttons)
##+#######################################################################
## For BUTTON widgets:
set fePADY_button 0
set fePADX_button 0
set feBDwidth_button 2
## For LABEL widgets:
set fePADY_label 0
set fePADX_label 0
set feBDwidth_label 2
## For RADIOBUTTON widgets:
set fePADY_radbutt 0
set fePADX_radbutt 0
set feBDwidth_radbutt 2
## For LISTBOX widgets:
set feBDwidth_listbox 2
## For ENTRY widgets:
set feBDwidth_entry 2
## For TEXT and MESSAGE widgets:
set feBDwidth_text 2
# set feBDwidth_msg 2
##+#######################################################################
## SET the top window MIN-SIZE (roughly).
##
## For width: on the LEFT SIDE of the GUI, allow for
## about 20 chars for the button-function names in the listbox.
## and, on the RIGHT SIDE of the GUI, allow for
## the minwidth of the '.fRbuttons' frame:
## at least 4 buttons (Exit,Help,SetMap,...,ColorMe).
##
## For height: allow about 20 chars high --- so that at least 20 function
## names show in the listbox.
##+#######################################################################
set minWinWidthPx [font measure fontTEMP_varwidth \
"123456789012345 Exit Help SetMap ColorMe"]
## Add some pixels to account for right-left-side window decoration
## (about 8 pixels), about 6 widgets x 4 pixels/widget for borders/padding
## for 6 widgets --- listbox, 4 or 5 buttons.
set minWinWidthPx [expr {32 + $minWinWidthPx}]
## MIN HEIGHT --- allow for about 20 chars high in the listbox:
set charHeightPx [font metrics fontTEMP_fixedwidth -linespace]
set minWinHeightPx [expr { 20 * $charHeightPx}]
## Add about 28 pixels for top-bottom window decoration, and
## about 6 pixels for the listbox widget's vertical borders/padding.
set minWinHeightPx [expr {$minWinHeightPx + 34}]
## FOR TESTING:
# puts "minWinWidthPx = $minWinWidthPx"
# puts "minWinHeightPx = $minWinHeightPx"
wm minsize . $minWinWidthPx $minWinHeightPx
## We allow the window to be resizable and we pack the listbox
## (and a scrollable text widget) with '-fill both' so that the
## listbox (and scrollable text widget) can be enlarged by
## enlarging the window.
## If you want to make the window un-resizable,
## you can use the following statement.
# wm resizable . 0 0
##+####################################################################
## Set a TEXT-ARRAY to hold text for buttons & labels on the GUI.
## NOTE: This can aid INTERNATIONALIZATION. This array can
## be set according to a nation/region parameter.
##+####################################################################
## if { "$VARlocale" == "en"}
set aRtext(buttonEXIT) "Exit"
set aRtext(buttonHELP) "Help"
set aRtext(buttonSETMAP) "SETmap"
set aRtext(buttonGETMAP) "GETmap"
set aRtext(buttonTEST) "Test"
set aRtext(buttonCOLOR) "ColorMe"
set aRtext(labelDEVICEID) "Device ID:"
set aRtext(labelFUNCS) "Functions to map to the numbers"
set aRtext(labelRADBUTTS) " Choose a 'button'-number to map next:"
set aRtext(labelXINPARMS) "Map-list for 'SETmap':"
set aRtext(labelXINLIST) \
"'xinput list' output: (These are devices discovered on this host. Note 'Type is MOUSE', etc.)"
## END OF if { "$VARlocale" == "en"}
##+####################################################################
##+####################################################################
## DEFINE *ALL* THE FRAMES:
##
## Top-level : 'fRleft' and 'fRright'
##
## Sub-frames of 'fRleft': none, just one listbox with scrollbar(s)
##
## Sub-frames of 'fRright' (top to bottom):
##
## - 'fRbuttons'
## - 'fRradbutts0'
## - 'fRradbutts1'
## - 'fRradbutts2'
## - 'fRradbutts3'
## - 'fRxinputparms'
## - 'fRxinputlist'
##+####################################################################
##+####################################################################
## FOR TESTING of expansion of frames (esp. during window expansion):
# set feRELIEF_frame raised
# set feBDwidth_frame 2
set feRELIEF_frame flat
set feBDwidth_frame 0
frame .fRleft -relief $feRELIEF_frame -borderwidth $feBDwidth_frame
frame .fRright -relief $feRELIEF_frame -borderwidth $feBDwidth_frame
frame .fRright.fRbuttons \
-relief $feRELIEF_frame -borderwidth $feBDwidth_frame
frame .fRright.fRradbutts0 \
-relief $feRELIEF_frame -borderwidth $feBDwidth_frame
frame .fRright.fRradbutts1 \
-relief $feRELIEF_frame -borderwidth $feBDwidth_frame
frame .fRright.fRradbutts2 \
-relief $feRELIEF_frame -borderwidth $feBDwidth_frame
frame .fRright.fRradbutts3 \
-relief $feRELIEF_frame -borderwidth $feBDwidth_frame
frame .fRright.fRxinputparms \
-relief $feRELIEF_frame -borderwidth $feBDwidth_frame
frame .fRright.fRxinputlist \
-relief $feRELIEF_frame -borderwidth $feBDwidth_frame
##+########################################################
## PACK *ALL* the FRAMES.
##+########################################################
pack .fRleft \
-side left \
-anchor nw \
-fill both \
-expand 0
pack .fRright \
-side left \
-anchor nw \
-fill both \
-expand 1
## PACK the subframes of '.fRright'.
pack .fRright.fRbuttons \
-side top \
-anchor nw \
-fill none \
-expand 0
pack .fRright.fRradbutts0 \
-side top \
-anchor nw \
-fill none \
-expand 0
pack .fRright.fRradbutts1 \
-side top \
-anchor nw \
-fill none \
-expand 0
pack .fRright.fRradbutts2 \
-side top \
-anchor nw \
-fill none \
-expand 0
pack .fRright.fRradbutts3 \
-side top \
-anchor nw \
-fill none \
-expand 0
pack .fRright.fRxinputparms \
-side top \
-anchor nw \
-fill x \
-expand 0
pack .fRright.fRxinputlist \
-side top \
-anchor nw \
-fill both \
-expand 1
##+################################################################
##+################################################################
## START DEFINING & PACKING WIDGETS WITHIN THEIR FRAMES.
##+################################################################
##+################################################################
##+########################################################
## IN THE 'fRleft' frame -- DEFINE 1 listbox widget,
## with vertical scrollbar.
##+########################################################
label .fRleft.labelFUNCS \
-text "$aRtext(labelFUNCS)" \
-font fontTEMP_label \
-justify left \
-anchor w \
-bg "$hiliteBKGD" \
-relief flat \
-bd 0
listbox .fRleft.listbox \
-width 20 \
-height 25 \
-font fontTEMP_listbox \
-relief raised \
-borderwidth 2 \
-state normal \
-yscrollcommand ".fRleft.scrbary set" \
-xscrollcommand ".fRleft.scrbarx set" \
# -width 0 \
# -height 0 \
scrollbar .fRleft.scrbary \
-orient vertical -command ".fRleft.listbox yview"
scrollbar .fRleft.scrbarx \
-orient horizontal -command ".fRleft.listbox xview"
## Pack the widgets in the 'fRleft' frame.
pack .fRleft.labelFUNCS \
-side top \
-anchor nw \
-fill none \
-expand 0
pack .fRleft.scrbary \
-side right \
-anchor e \
-fill y \
-expand 0
pack .fRleft.scrbarx \
-side bottom \
-anchor sw \
-fill x \
-expand 0
pack .fRleft.listbox \
-side left \
-anchor nw \
-fill both \
-expand 1
##+#############################################################
## START DEFINING WIDGETS and PACKING in THE *RIGHT-SIDE* FRAME:
##+#############################################################
##+##########################################################
## IN THE 'fRright.fRbuttons' frame --
## DEFINE several BUTTONS
## --- Exit, Help, SetMap, ... , ColorMe.
##+##########################################################
button .fRright.fRbuttons.buttEXIT \
-text "$aRtext(buttonEXIT)" \
-font fontTEMP_button \
-padx $fePADX_button \
-pady $fePADY_button \
-relief raised \
-bd $feBDwidth_button \
-command {exit}
button .fRright.fRbuttons.buttHELP \
-text "$aRtext(buttonHELP)" \
-font fontTEMP_button \
-padx $fePADX_button \
-pady $fePADY_button \
-relief raised \
-bd $feBDwidth_button \
-command {popup_msgVarWithScroll .topHelp "$HELPtext"}
button .fRright.fRbuttons.buttSETMAP \
-text "$aRtext(buttonSETMAP)" \
-font fontTEMP_button \
-padx $fePADX_button \
-pady $fePADY_button \
-relief raised \
-bd $feBDwidth_button \
-command {xinput_setmap}
button .fRright.fRbuttons.buttGETMAP \
-text "$aRtext(buttonGETMAP)" \
-font fontTEMP_button \
-padx $fePADX_button \
-pady $fePADY_button \
-relief raised \
-bd $feBDwidth_button \
-command {xinput_getmap}
button .fRright.fRbuttons.buttTEST \
-text "$aRtext(buttonTEST)" \
-font fontTEMP_button \
-padx $fePADX_button \
-pady $fePADY_button \
-relief raised \
-bd $feBDwidth_button \
-command {xinput_test}
button .fRright.fRbuttons.buttCOLOR \
-text "$aRtext(buttonCOLOR)" \
-font fontTEMP_button \
-padx $fePADX_button \
-pady $fePADY_button \
-relief raised \
-bd $feBDwidth_button \
-command {getset_bkgdcolor}
label .fRright.fRbuttons.labelDEVICEID \
-text "$aRtext(labelDEVICEID)" \
-font fontTEMP_label \
-justify left \
-anchor w \
-bg "$hiliteBKGD" \
-relief flat \
-bd $feBDwidth_label
set deviceID "?"
entry .fRright.fRbuttons.entDEVICEID \
-textvariable deviceID \
-bg $entryBKGD \
-font fontTEMP_entry \
-width 2 \
-relief sunken \
-bd $feBDwidth_entry
## Label Widget on which to post some radbutts-info.
# label .fRright.fRbuttons.labelINFO \
# -text "$aRtext(labelINFO)" \
# -font fontTEMP_label \
# -justify left \
# -anchor w \
# -relief flat \
# -bd 0
##+##########################################
## Pack the widgets in the 'fRbuttons' frame.
##+##########################################
pack .fRright.fRbuttons.buttEXIT \
.fRright.fRbuttons.buttHELP \
.fRright.fRbuttons.buttSETMAP \
.fRright.fRbuttons.buttGETMAP \
.fRright.fRbuttons.buttTEST \
.fRright.fRbuttons.buttCOLOR \
.fRright.fRbuttons.labelDEVICEID \
.fRright.fRbuttons.entDEVICEID \
-side left \
-anchor w \
-fill none \
-expand 0
##+########################################################
## IN THE 'fRright.fRradbutts0' frame --
## DEFINE a LABEL widget.
##+########################################################
label .fRright.fRradbutts0.labelINFO \
-text "$aRtext(labelRADBUTTS)" \
-font fontTEMP_label \
-justify left \
-anchor w \
-bg "$hiliteBKGD" \
-relief flat \
-bd 0
pack .fRright.fRradbutts0.labelINFO \
-side left \
-anchor w \
-fill none \
-expand 0
##+########################################################
## IN THE 'fRright.fRradbutts1' frame --
## DEFINE about 8 RADIOBUTTON widgets,
## with varname 'positionIDX'.
##+########################################################
set spacerPx 150
frame .fRright.fRradbutts1.spacer \
-width $spacerPx \
-relief flat \
-bd 0
## We will set 'positionIDX' (the radiobuttons variable) in
## the additional-GUI-init section at the bottom of this script.
##
# set positionIDX 2
radiobutton .fRright.fRradbutts1.radbutt01 \
-text "01" \
-font fontTEMP_button \
-anchor w \
-variable positionIDX \
-value "1" \
-selectcolor "$radbuttBKGD" \
-relief flat \
-bd 0
radiobutton .fRright.fRradbutts1.radbutt02 \
-text "02" \
-font fontTEMP_button \
-anchor w \
-variable positionIDX \
-value "2" \
-selectcolor "$radbuttBKGD" \
-relief flat \
-bd 0
radiobutton .fRright.fRradbutts1.radbutt03 \
-text "03" \
-font fontTEMP_button \
-anchor w \
-variable positionIDX \
-value "3" \
-selectcolor "$radbuttBKGD" \
-relief flat \
-bd 0
radiobutton .fRright.fRradbutts1.radbutt04 \
-text "04" \
-font fontTEMP_button \
-anchor w \
-variable positionIDX \
-value "4" \
-selectcolor "$radbuttBKGD" \
-relief flat \
-bd 0
radiobutton .fRright.fRradbutts1.radbutt05 \
-text "05" \
-font fontTEMP_button \
-anchor w \
-variable positionIDX \
-value "5" \
-selectcolor "$radbuttBKGD" \
-relief flat \
-bd 0
radiobutton .fRright.fRradbutts1.radbutt06 \
-text "06" \
-font fontTEMP_button \
-anchor w \
-variable positionIDX \
-value "6" \
-selectcolor "$radbuttBKGD" \
-relief flat \
-bd 0
radiobutton .fRright.fRradbutts1.radbutt07 \
-text "07" \
-font fontTEMP_button \
-anchor w \
-variable positionIDX \
-value "7" \
-selectcolor "$radbuttBKGD" \
-relief flat \
-bd 0
radiobutton .fRright.fRradbutts1.radbutt08 \
-text "08" \
-font fontTEMP_button \
-anchor w \
-variable positionIDX \
-value "8" \
-selectcolor "$radbuttBKGD" \
-relief flat \
-bd 0
## Pack the widgets in frame 'fRradbutts1'.
pack .fRright.fRradbutts1.spacer \
.fRright.fRradbutts1.radbutt01 \
.fRright.fRradbutts1.radbutt02 \
.fRright.fRradbutts1.radbutt03 \
.fRright.fRradbutts1.radbutt04 \
.fRright.fRradbutts1.radbutt05 \
.fRright.fRradbutts1.radbutt06 \
.fRright.fRradbutts1.radbutt07 \
.fRright.fRradbutts1.radbutt08 \
-side left \
-anchor w \
-fill none \
-expand 0
##+########################################################
## IN THE 'fRright.fRradbutts2' frame --
## DEFINE about 8 MORE RADIOBUTTON widgets,
## with varname 'positionIDX'.
##+########################################################
frame .fRright.fRradbutts2.spacer \
-width $spacerPx \
-relief flat \
-bd 0
## We will set 'positionIDX' (the radiobuttons variable) in
## the additional-GUI-init section at the bottom of this script.
##
# set positionIDX 2
radiobutton .fRright.fRradbutts2.radbutt09 \
-text "09" \
-font fontTEMP_button \
-anchor w \
-variable positionIDX \
-value "9" \
-selectcolor "$radbuttBKGD" \
-relief flat \
-bd 0
radiobutton .fRright.fRradbutts2.radbutt10 \
-text "10" \
-font fontTEMP_button \
-anchor w \
-variable positionIDX \
-value "10" \
-selectcolor "$radbuttBKGD" \
-relief flat \
-bd 0
radiobutton .fRright.fRradbutts2.radbutt11 \
-text "11" \
-font fontTEMP_button \
-anchor w \
-variable positionIDX \
-value "11" \
-selectcolor "$radbuttBKGD" \
-relief flat \
-bd 0
radiobutton .fRright.fRradbutts2.radbutt12 \
-text "12" \
-font fontTEMP_button \
-anchor w \
-variable positionIDX \
-value "12" \
-selectcolor "$radbuttBKGD" \
-relief flat \
-bd 0
radiobutton .fRright.fRradbutts2.radbutt13 \
-text "13" \
-font fontTEMP_button \
-anchor w \
-variable positionIDX \
-value "13" \
-selectcolor "$radbuttBKGD" \
-relief flat \
-bd 0
radiobutton .fRright.fRradbutts2.radbutt14 \
-text "14" \
-font fontTEMP_button \
-anchor w \
-variable positionIDX \
-value "14" \
-selectcolor "$radbuttBKGD" \
-relief flat \
-bd 0
radiobutton .fRright.fRradbutts2.radbutt15 \
-text "15" \
-font fontTEMP_button \
-anchor w \
-variable positionIDX \
-value "15" \
-selectcolor "$radbuttBKGD" \
-relief flat \
-bd 0
radiobutton .fRright.fRradbutts2.radbutt16 \
-text "16" \
-font fontTEMP_button \
-anchor w \
-variable positionIDX \
-value "16" \
-selectcolor "$radbuttBKGD" \
-relief flat \
-bd 0
## Pack the widgets in frame 'fRradbutts2'.
pack .fRright.fRradbutts2.spacer \
.fRright.fRradbutts2.radbutt09 \
.fRright.fRradbutts2.radbutt10 \
.fRright.fRradbutts2.radbutt11 \
.fRright.fRradbutts2.radbutt12 \
.fRright.fRradbutts2.radbutt13 \
.fRright.fRradbutts2.radbutt14 \
.fRright.fRradbutts2.radbutt15 \
.fRright.fRradbutts2.radbutt16 \
-side left \
-anchor w \
-fill none \
-expand 0
##+########################################################
## IN THE 'fRright.fRradbutts3' frame --
## DEFINE about 8 MORE RADIOBUTTON widgets,
## with varname 'positionIDX'.
##+########################################################
frame .fRright.fRradbutts3.spacer \
-width $spacerPx \
-relief flat \
-bd 0
## We will set 'positionIDX' (the radiobuttons variable) in
## the additional-GUI-init section at the bottom of this script.
##
# set positionIDX 2
radiobutton .fRright.fRradbutts3.radbutt17 \
-text "17" \
-font fontTEMP_button \
-anchor w \
-variable positionIDX \
-value "17" \
-selectcolor "$radbuttBKGD" \
-relief flat \
-bd 0
radiobutton .fRright.fRradbutts3.radbutt18 \
-text "18" \
-font fontTEMP_button \
-anchor w \
-variable positionIDX \
-value "18" \
-selectcolor "$radbuttBKGD" \
-relief flat \
-bd 0
radiobutton .fRright.fRradbutts3.radbutt19 \
-text "19" \
-font fontTEMP_button \
-anchor w \
-variable positionIDX \
-value "19" \
-selectcolor "$radbuttBKGD" \
-relief flat \
-bd 0
radiobutton .fRright.fRradbutts3.radbutt20 \
-text "20" \
-font fontTEMP_button \
-anchor w \
-variable positionIDX \
-value "20" \
-selectcolor "$radbuttBKGD" \
-relief flat \
-bd 0
radiobutton .fRright.fRradbutts3.radbutt21 \
-text "21" \
-font fontTEMP_button \
-anchor w \
-variable positionIDX \
-value "21" \
-selectcolor "$radbuttBKGD" \
-relief flat \
-bd 0
radiobutton .fRright.fRradbutts3.radbutt22 \
-text "22" \
-font fontTEMP_button \
-anchor w \
-variable positionIDX \
-value "22" \
-selectcolor "$radbuttBKGD" \
-relief flat \
-bd 0
radiobutton .fRright.fRradbutts3.radbutt23 \
-text "23" \
-font fontTEMP_button \
-anchor w \
-variable positionIDX \
-value "23" \
-selectcolor "$radbuttBKGD" \
-relief flat \
-bd 0
radiobutton .fRright.fRradbutts3.radbutt24 \
-text "24" \
-font fontTEMP_button \
-anchor w \
-variable positionIDX \
-value "24" \
-selectcolor "$radbuttBKGD" \
-relief flat \
-bd 0
## Pack the widgets in frame 'fRradbutts3'.
pack .fRright.fRradbutts3.spacer \
.fRright.fRradbutts3.radbutt17 \
.fRright.fRradbutts3.radbutt18 \
.fRright.fRradbutts3.radbutt19 \
.fRright.fRradbutts3.radbutt20 \
.fRright.fRradbutts3.radbutt21 \
.fRright.fRradbutts3.radbutt22 \
.fRright.fRradbutts3.radbutt23 \
.fRright.fRradbutts3.radbutt24 \
-side left \
-anchor w \
-fill none \
-expand 0
##+########################################################
## IN THE 'fRright.fRxinputparms' frame --
## DEFINE a TEXT area --- to hold the current parameter
## settings for use in the 'xinput' command.
##+########################################################
label .fRright.fRxinputparms.labelXINPARMS \
-text "$aRtext(labelXINPARMS)" \
-font fontTEMP_label \
-justify left \
-anchor w \
-bg "$hiliteBKGD" \
-relief flat \
-bd 0
text .fRright.fRxinputparms.txtXINPARMS \
-font fontTEMP_SMALL_text \
-height 1 \
-width 72 \
-wrap none \
-relief raised \
-borderwidth $feBDwidth_text
## Pack the widget in frame '.fRright.fRxinputparms'.
pack .fRright.fRxinputparms.labelXINPARMS \
-side left \
-anchor w \
-fill none \
-expand 0
pack .fRright.fRxinputparms.txtXINPARMS \
-side left \
-anchor w \
-fill x \
-expand 0
##+########################################################
## IN THE 'fRright.fRxinputlist' frame --
## DEFINE a SCROLLABLE TEXT area --- to hold the output
## from the 'xinput list' command.
##+########################################################
label .fRright.fRxinputlist.labelXINLIST \
-text "$aRtext(labelXINLIST)" \
-font fontTEMP_label \
-justify left \
-anchor w \
-bg "$hilite2BKGD" \
-relief raised \
-bd 2
text .fRright.fRxinputlist.txtXINLIST \
-font fontTEMP_SMALL_text \
-height 9 \
-width 38 \
-wrap none \
-relief raised \
-borderwidth 4 \
-yscrollcommand ".fRright.fRxinputlist.scrbary set" \
-xscrollcommand ".fRright.fRxinputlist.scrbarx set"
scrollbar .fRright.fRxinputlist.scrbary \
-orient vertical \
-command ".fRright.fRxinputlist.txtXINLIST yview"
scrollbar .fRright.fRxinputlist.scrbarx \
-orient horizontal \
-command ".fRright.fRxinputlist.txtXINLIST xview"
##+########################################################
## PACK the widgets in the '.fRright.fRxinputlist' frame.
##+########################################################
pack .fRright.fRxinputlist.labelXINLIST \
-side top \
-anchor nw \
-fill none \
-expand 0
pack .fRright.fRxinputlist.scrbary \
-side right \
-anchor center \
-fill y \
-expand 0
pack .fRright.fRxinputlist.scrbarx \
-side bottom \
-anchor center \
-fill x \
-expand 0
pack .fRright.fRxinputlist.txtXINLIST \
-side top \
-anchor n \
-fill both \
-expand 1
##+#######################################################################
## GET AN INITIAL 'xinput list' OUTPUT, to show in a scrollable text widget.
##+#######################################################################
set xinputLISTtext [exec /usr/bin/xinput list]
##+#######################################################
## Load the 'txtXINLIST' widget using the 'insert' command.
##+#######################################################
.fRright.fRxinputlist.txtXINLIST insert end "$xinputLISTtext"
##+######################################################
## Keep the user from changing the output from the
## 'xinput list' command, in case they type in the widget.
##+######################################################
.fRright.fRxinputlist.txtXINLIST configure -state disabled
##+#####################################################################
## END OF MAIN SECTION TO SETUP THE GUI.
##+#####################################################################
##+#####################################################################
##+#####################################################################
## DEFINE BINDINGS:
## - Run the 'process_listbox_select' proc whenever
## there is a button1-release on the listbox.
##+#####################################################################
bind .fRleft.listbox <ButtonRelease-1> "process_listbox_select 0"
##+#####################################################################
##+#####################################################################
## DEFINE PROCEDURES:
##
## 'loadfuncs2listbox' - called in the 'additional-GUI-initialization'
## section at the bottom of this script.
##
## 'process_listbox_select' - called by a binding on the listbox
##
## 'init_xinput_parms_array' - called once in the
## 'additional-GUI-initialization' section
## at the bottom of this script.
##
## 'rebuild_xinput_parms' - called by the 'process_listbox_select' proc
##
## 'getset_bkgdcolor' - called by the Color button
## (gets Rpal255,Gpal255,Bpal255 via a GUI with 3 slider bars,
## then calls 'set_tkPalette')
##
## 'popup_msgVarWithScroll' - to show Help text when 'Help' button is clicked
##
##+#####################################################################
##+#####################################################################
##+#####################################################################
## proc 'loadfuncs2listbox'
##+#####################################################################
## PURPOSE: Loads names for pointer-device functions to listbox.
##
##
## CALLED BY: Done once, at GUI initialization, at bottom of this script.
##+#####################################################################
proc loadfuncs2listbox { } {
## Make sure the listbox is empty.
.fRleft.listbox delete 0 end
## Insert each function name into the listbox list.
.fRleft.listbox insert end "NoOperation"
.fRleft.listbox insert end "functionOfButton1(select)"
.fRleft.listbox insert end "functionOfButton2(paste)"
.fRleft.listbox insert end "functionOfButton3(menu)"
.fRleft.listbox insert end "functionOfButton4(scrollUp)"
.fRleft.listbox insert end "functionOfButton5(scrollDown)"
.fRleft.listbox insert end "functionOfButton6"
.fRleft.listbox insert end "functionOfButton7"
.fRleft.listbox insert end "functionOfButton8"
.fRleft.listbox insert end "functionOfButton9"
.fRleft.listbox insert end "functionOfButton10"
.fRleft.listbox insert end "functionOfButton11"
.fRleft.listbox insert end "functionOfButton12"
.fRleft.listbox insert end "functionOfButton13"
.fRleft.listbox insert end "functionOfButton14"
.fRleft.listbox insert end "functionOfButton15"
.fRleft.listbox insert end "functionOfButton16"
.fRleft.listbox insert end "functionOfButton17"
.fRleft.listbox insert end "functionOfButton18"
.fRleft.listbox insert end "functionOfButton19"
.fRleft.listbox insert end "functionOfButton20"
.fRleft.listbox insert end "functionOfButton21"
.fRleft.listbox insert end "functionOfButton22"
.fRleft.listbox insert end "functionOfButton23"
.fRleft.listbox insert end "functionOfButton24"
}
## END OF PROC 'loadfuncs2listbox'
##+################################################################
## proc 'process_listbox_select'
##+################################################################
## PURPOSE: Uses the listbox selection (and the current value
## of the 'positionIDX' radiobuttons variable) to update
## the text in the 'fRxinputparms.txtLIST' text widget.
##
## CALLED BY: bindings (above) on the listbox
##+################################################################
proc process_listbox_select {x} {
global positionIDX
set sel_index [ .fRleft.listbox curselection ]
# if { $sel_index != "" } {
# set sel_func [ .fRleft.listbox get $sel_index ]
# }
## FOR TESTING:
# puts "process_listbox_select: sel_func = $sel_func"
## Rebuild the string for the 'fRxinputparms.txtXINPARMS' text widget
## and load the string into the 'fRxinputparms.txtXINPARMS' text widget
## using the 'insert' command.
.fRright.fRxinputparms.txtXINPARMS delete 1.0 end
.fRright.fRxinputparms.txtXINPARMS insert end \
[rebuild_xinput_parms $sel_index]
## FOR TESTING:
# puts "process_listbox_select: sel_index = $sel_index"
}
## END OF PROC 'process_listbox_select'
##+################################################################
## proc 'init_xinput_parms_array'
##+################################################################
## PURPOSE: Loads the array 'aRfuncs4butts' that
## holds the current mapping of function-numbers to
## button-numbers --- and
## builds the text string for the 'fRxinputparms.txtLIST'
## text widget, and inserts the string in the widget.
##
## CALLED BY: once in the 'Additional GUI Initialization' section
## at the bottom of this script.
##+################################################################
proc init_xinput_parms_array {} {
global aRfuncs4butts NUMSstring
# global deviceID
## The following simple loop may be replaced by an
## 'xinput get-button-map $deviceID' query
## to initialize this array according to current
## settings for the user-specified device.
for {set k 1} {$k <= 24} {incr k} {
set aRfuncs4butts($k) "$k"
}
########################################################
## The following sections allow the user to set defaults
## to appear when the GUI first comes up, showing the
## NUMSstring var which is set below. These defaults can
## be set to suit the user's choice of mouse.
########################################################
#######################################################
## ** M500 or M510:
## Override the sequential setting of 'xinput_parms_array',
## to set the 'aRfuncs4butts' array for a *Logitech M500*
## corded mouse or *Logitech M510* wireless mouse or other
## similar mice --- to change buttons 8 and 9 to paste,
## and de-activate the paste function of button 2.
##
## NOTE: This did not work out well. Buttons 8 and 9 are
## on the side of the mouse, and pushing them causes
## the mouse to move when doing a paste --- making it
## hard to paste text where it should go. See the next
## set of settings for the Logitech M500 mouse.
#######################################################
if {0} {
set aRfuncs4butts(2) "0"
set aRfuncs4butts(8) "2"
set aRfuncs4butts(9) "2"
}
#######################################################
## ** M500 or M510:
## Override the sequential setting above, to
## set the 'aRfuncs4butts' array for a *Logitech M500*
## corded mouse or *Logitech M510* wireless mouse or other
## similar mice --- to change buttons 8 and 9 to scroll
## up and down, deactivate 4 and 5 (so that button2
## does not scroll --- ONLY paste).
##
## NOTE: This is 'pretty good', but since 8 and 9 do not
## 'roll' (i.e. repeat an up or down movement easily),
## one has to keep pushing the side buttons to scroll
## a 'chunk' per press --- i.e. scrolling is slow.
## Another issue is the unpleasant feel of the scroll
## wheel tending to roll when one pushes down on it to
## do a paste.
#######################################################
if {0} {
set aRfuncs4butts(4) "0"
set aRfuncs4butts(5) "0"
set aRfuncs4butts(8) "5"
set aRfuncs4butts(9) "4"
}
#######################################################
## ** G300:
## Override the sequential setting above, to set
## the 'aRfuncs4butts' array for a *Logitech G300*
## corded 'gaming' mouse --- to change buttons 8 (on
## the top left of the mouse) to paste --- and deactivate
## paste on button 2 (the scroll wheel).
##
## NOTE: At least pushing down on button 8 (or 9) to do a
## paste does not move the mouse sideways --- and I still
## have the scrollwheel for fast up and down scrolling.
## This 8,9-paste works in all 3 'profiles' of the G300.
## xinput-test does not show button numbers when I
## press on the 2 buttons on the right of the G300, no
## matter which of the 3 profiles I am in. (???)
## It looks like I cannot de-activate those buttons.
## They act like Ctl-V and Ctl-C when in 'blue' mode.
## I will not use 'blue' mode so I don't accidentally
## do a paste --- or go into copy-mode.
########################################################
if {1} {
set aRfuncs4butts(2) "0"
set aRfuncs4butts(8) "2"
set aRfuncs4butts(9) "2"
}
####################################################
## Build a text string from the aRfuncs4butts array.
####################################################
set NUMSstring ""
for {set k 1} {$k <= 24} {incr k} {
set NUMSstring "$NUMSstring $aRfuncs4butts($k)"
}
####################################################
## Insert the string in the txtXINPARMS text widget.
####################################################
.fRright.fRxinputparms.txtXINPARMS delete 1.0 end
.fRright.fRxinputparms.txtXINPARMS insert end "$NUMSstring"
}
## END OF PROC 'init_xinput_parms_array'
##+################################################################
## proc 'rebuild_xinput_parms'
##+################################################################
## PURPOSE: Uses the listbox selection index (and the current value
## of the 'positionIDX' radiobuttons variable) to update
## an entry in the xinput-parms-array, aRfuncs4butts ---
## and rebuild the text string for the 'fRxinputparms.txtLIST'
## text widget.
##
## CALLED BY: the 'process_listbox_select' proc
##+################################################################
proc rebuild_xinput_parms {func_idx} {
global aRfuncs4butts positionIDX NUMSstring
set aRfuncs4butts($positionIDX) "$func_idx"
## FOR TESTING:
# puts "rebuild_xinput_parms:"
# puts " func_idx = $func_idx"
# puts " positionIDX = $positionIDX"
# puts " aRfuncs4butts(positionIDX) = $aRfuncs4butts($positionIDX)"
set NUMSstring ""
for {set k 1} {$k <= 24} {incr k} {
set NUMSstring "$NUMSstring $aRfuncs4butts($k)"
}
## FOR TESTING:
# puts "rebuild_xinput_parms: NUMSstring = $NUMSstring"
return "$NUMSstring"
}
## END OF PROC 'rebuild_xinput_parms'
##+################################################################
## proc 'xinput_setmap'
##+################################################################
## PURPOSE: Runs the command
## xinput set-button-map $deviceID $NUMSstring
## to reset the 'button-map' of the user-specified device
## according to the current numbers in $NUMstring.
##
## CALLED BY: the 'SetMap' button
##+################################################################
proc xinput_setmap {} {
global deviceID NUMSstring
## We popup a msg-window to the user if device-ID not set.
# if {"$deviceID" == "?"}
if {![string is integer $deviceID]} {
popup_msgVarWithScroll .topMsg "Device ID needed."
return
}
set deviceID [string trim $deviceID]
## NO GOOD: (no error msg, but no effect)
# exec /usr/bin/xinput set-button-map $deviceID $NUMSstring
## NO GOOD: (no error msg, but no effect)
# exec /usr/bin/xinput set-button-map $deviceID $NUMSstring &
## The '/bin/sh -c' technique WORKS!!!
exec /bin/sh -c "/usr/bin/xinput set-button-map $deviceID $NUMSstring"
## FOR TESTING:
# puts "xinput_setmap > Ran the command:"
# puts "/usr/bin/xinput set-button-map $deviceID $NUMSstring"
}
## END OF PROC 'xinput_setmap'
##+################################################################
## proc 'xinput_getmap'
##+################################################################
## PURPOSE: Runs the command
## xinput get-button-map $deviceID
## to get the 'button-map' of the user-specified device.
##
## CALLED BY: the 'GetMap' button
##+################################################################
proc xinput_getmap {} {
global deviceID NUMSstring aRfuncs4butts
## We popup a msg-window to the user if device-ID not set.
if {![string is integer $deviceID]} {
popup_msgVarWithScroll .topMsg "Device ID needed."
return
}
set deviceID [string trim $deviceID]
## Some example 'exec' code:
# exec /usr/bin/sh -c "$EDITOR_text "$FULFILname" > /dev/null 2>&1"
# -command "exec $feREADER_text ./dir2dir_fileman.hlp &"
set NUMSstring [exec /usr/bin/xinput get-button-map $deviceID]
## FOR TESTING:
# puts "xinput_setmap > Ran the command:"
# puts "/usr/bin/xinput get-button-map $deviceID"
## Insert the string in the txtXINPARMS widget.
.fRright.fRxinputparms.txtXINPARMS delete 1.0 end
.fRright.fRxinputparms.txtXINPARMS insert end "$NUMSstring"
## Say NUMSstring returned from 'get-button-map' is a string of
## N integers. I need to load those N integers into the first
## N entries of the array 'aRfuncs4butts'. (Thing-to-do.)
set CNT 1
foreach N $NUMSstring {
set aRfuncs4butts($CNT) $N
incr CNT
}
}
## END OF PROC 'xinput_getmap'
##+################################################################
## proc 'xinput_test'
##+################################################################
## PURPOSE: Runs the command
## xterm -hold ... -e xinput test $deviceID
## to monitor 'events' from the user-specified device.
##
## CALLED BY: the 'Test' button
##+################################################################
proc xinput_test {} {
global deviceID
## We popup a msg-window to the user if device-ID not set.
if {![string is integer $deviceID]} {
popup_msgVarWithScroll .topMsg "Device ID needed."
return
}
exec xterm -hold -fg white -bg black -e \
/usr/bin/xinput test $deviceID
}
## END OF PROC 'xinput_test'
##+#####################################################################
## proc 'getset_bkgdcolor'
##+#####################################################################
## PURPOSE:
## This procedure is invoked to get an RGB triplet (Rpal255 Gpal255 Bpal255)
## via 3 RGB slider bars.
##
## Then uses 'set_palette' proc to set window color scheme.
##
## CALLED BY: .fRright.fRbuttons.buttCOLOR button
##+#####################################################################
proc getset_bkgdcolor {} {
global Rpal255 Gpal255 Bpal255
# global feDIR_tkguis
## FOR TESTING:
# puts "Rpal255: $Rpal255"
# puts "Gpal255: $Gpal255"
# puts "Bpal255: $Bpal255"
set TEMPrgb [ exec \
./sho_colorvals_via_sliders3rgb.tk \
$Rpal255 $Gpal255 $Bpal255]
# $feDIR_tkguis/sho_colorvals_via_sliders3rgb.tk \
## FOR TESTING:
# puts "TEMPrgb: $TEMPrgb"
if { "$TEMPrgb" == "" } { return }
scan $TEMPrgb "%s %s %s %s" Rpal255 Gpal255 Bpal255 hexRGB
## FOR TESTING:
# puts "TEMPrgb: $TEMPrgb"
# puts "Rpal255: $Rpal255"
# puts "Gpal255: $Gpal255"
# puts "Bpal255: $Bpal255"
# set hexRGB [format "#%02X%02X%02X" $Rpal255 $Gpal255 $Bpal255]
tk_setPalette "#$hexRGB"
}
## END OF PROC 'getset_bkgdcolor'
##+########################################################################
## PROC 'popup_msgVarWithScroll'
##+########################################################################
## PURPOSE: Report help or error conditions to the user.
##
## We do not use focus,grab,tkwait in this proc,
## because we use it to show help when the GUI is idle,
## and we may want the user to be able to keep the Help
## window open while doing some other things with the GUI
## such as putting a filename in the filename entry field
## or clicking on a radiobutton.
##
## For a similar proc with focus-grab-tkwait added,
## see the proc 'popup_msgVarWithScroll_wait' in a
## 3DterrainGeneratorExaminer Tk script.
##
## REFERENCE: page 602 of 'Practical Programming in Tcl and Tk',
## 4th edition, by Welch, Jones, Hobbs.
##
## ARGUMENTS: A toplevel frame name (such as .fRhelp or .fRerrmsg)
## and a variable holding text (many lines, if needed).
##
## CALLED BY: 'help' button
##+########################################################################
## To have more control over the formatting of the message (esp.
## words per line), we use this 'toplevel-text' method,
## rather than the 'tk_dialog' method -- like on page 574 of the book
## by Hattie Schroeder & Mike Doyel,'Interactive Web Applications
## with Tcl/Tk', Appendix A "ED, the Tcl Code Editor".
##+########################################################################
proc popup_msgVarWithScroll { toplevName VARtext } {
## global fontTEMP_varwidth #; Not needed. 'wish' makes this global.
## global env
# bell
# bell
#################################################
## Set VARwidth & VARheight from $VARtext.
#################################################
## To get VARheight,
## split at '\n' (newlines) and count 'lines'.
#################################################
set VARlist [ split $VARtext "\n" ]
## For testing:
# puts "VARlist: $VARlist"
set VARheight [ llength $VARlist ]
## For testing:
# puts "VARheight: $VARheight"
#################################################
## To get VARwidth,
## loop through the 'lines' getting length
## of each; save max.
#################################################
set VARwidth 0
#############################################
## LOOK AT EACH LINE IN THE LIST.
#############################################
foreach line $VARlist {
#############################################
## Get the length of the line.
#############################################
set LINEwidth [ string length $line ]
if { $LINEwidth > $VARwidth } {
set VARwidth $LINEwidth
}
}
## END OF foreach line $VARlist
## For testing:
# puts "VARwidth: $VARwidth"
###############################################################
## NOTE: VARwidth works for a fixed-width font used for the
## text widget ... BUT the programmer may need to be
## careful that the contents of VARtext are all
## countable characters by the 'string length' command.
###############################################################
#####################################
## SETUP 'TOP LEVEL' HELP WINDOW.
#####################################
catch {destroy $toplevName}
toplevel $toplevName
# wm geometry $toplevName 600x400+100+50
wm geometry $toplevName +100+50
wm title $toplevName "Note"
# wm title $toplevName "Note to $env(USER)"
wm iconname $toplevName "Note"
#####################################
## In the frame '$toplevName' -
## DEFINE THE TEXT WIDGET and
## its two scrollbars --- and
## DEFINE an OK BUTTON widget.
#####################################
if {$VARheight > 10} {
text $toplevName.text \
-wrap none \
-font fontTEMP_varwidth \
-width $VARwidth \
-height $VARheight \
-bg "#f0f0f0" \
-relief raised \
-bd 2 \
-yscrollcommand "$toplevName.scrolly set" \
-xscrollcommand "$toplevName.scrollx set"
scrollbar $toplevName.scrolly \
-orient vertical \
-command "$toplevName.text yview"
scrollbar $toplevName.scrollx \
-orient horizontal \
-command "$toplevName.text xview"
} else {
text $toplevName.text \
-wrap none \
-font fontTEMP_varwidth \
-width $VARwidth \
-height $VARheight \
-bg "#f0f0f0" \
-relief raised \
-bd 2
}
button $toplevName.butt \
-text "OK" \
-font fontTEMP_varwidth \
-command "destroy $toplevName"
###############################################
## PACK *ALL* the widgets in frame '$toplevName'.
###############################################
## Pack the bottom button BEFORE the
## bottom x-scrollbar widget,
pack $toplevName.butt \
-side bottom \
-anchor center \
-fill none \
-expand 0
if {$VARheight > 10} {
## Pack the scrollbars BEFORE the text widget,
## so that the text does not monopolize the space.
pack $toplevName.scrolly \
-side right \
-anchor center \
-fill y \
-expand 0
## DO NOT USE '-expand 1' HERE on the Y-scrollbar.
## THAT ALLOWS Y-SCROLLBAR TO EXPAND AND PUTS
## BLANK SPACE BETWEEN Y-SCROLLBAR & THE TEXT AREA.
pack $toplevName.scrollx \
-side bottom \
-anchor center \
-fill x \
-expand 0
## DO NOT USE '-expand 1' HERE on the X-scrollbar.
## THAT KEEPS THE TEXT AREA FROM EXPANDING.
pack $toplevName.text \
-side top \
-anchor center \
-fill both \
-expand 1
} else {
pack $toplevName.text \
-side top \
-anchor center \
-fill both \
-expand 1
}
#####################################
## LOAD MSG INTO TEXT WIDGET.
#####################################
## $toplevName.text delete 1.0 end
$toplevName.text insert end $VARtext
$toplevName.text configure -state disabled
}
## END OF PROC 'popup_msgVarWithScroll'
##+########################
## END of PROC definitions.
##+########################
## Set HELPtext var.
##+########################
set HELPtext "\
\ \ \ \ \ ** HELP for this 'tkPointerSettings' Utility **
This utility provides a GUI wrapper for the 'xinput' command
--- so that you can run 'xinput' in an 'assist-mode' --- to,
in the end, use 'xinput' to change functions of 'buttons' of
a mouse or other 'pointer' device.
The GUI supplies radiobuttons, a listbox, and other widgets that
allow the user to change functions of (or assign functions
to) the various buttons or 'features' of a 'pointer device'.
Here 'feature' is meant to represent an action that
is performed by other than a button press --- such as
a tilt (right or left) of the scroll-wheel.
Furthermore, rolling a scroll-wheel UP corresponds
to one 'button' number, while rolling the scroll-wheel
DOWN corresponds to another 'button' number --- even
though these actions do not really involve a 'button'.
(It might be helpful to think in terms of 'wires' rather
than 'buttons'.)
The term 'pointer device' is meant to convey that this Tk GUI
'wrapper' script can apply to devices other than computer
mice --- devices such as touchpads or game 'pad' controllers,
or even a touchscreen.
Some of the typical uses of this GUI are to
1) Switch the functions of mouse buttons 1 and 3,
for left-handed users.
2) Deactivate the 'paste' function of mouse-button 2 ---
for users of a mouse with scroll-wheel --- when pressing
down too hard on the scroll-wheel causes an unwanted
paste operation.
3) Deactivate the 'scroll' functions of the scroll-wheel ---
so that the wheel can be used just for the 'paste' function,
without accidentally scrolling a window while doing the paste.
4) Assign 'thumb' buttons 6 and/or 7 (on a scroll-wheel mouse
with extra buttons) so that the 'paste' operation can be
done with one or both of the additional 'thumb' buttons.
(For a scroll-wheel mouse whose scroll-wheel can be
tilted left or right and thus send signals ---
corresponding to 'buttons' 6 and 7, one might assign
'thumb' buttons 8 and/or 9 the 'paste' function.)
5) Or perhaps a better alternative to 4, for those who like
a quick swipe-and-paste operation with buttons 1 and 2,
where 2 is a scroll wheel, is:
Deactivate the scroll up and down functions of
'buttons' 4 and 5 (so that button 2, the scroll wheel,
is just used for paste, not scroll) --- and re-assign the
scroll up and down functions of the scroll wheel
to side (thumb) buttons 9 and 8, respectively.
(This works better for text pasting, because we need
the thumb to hold the mouse down firmly while we do the
paste with the index finger pressed on the scroll wheel.
We do not need this precise, held-steady positioning
of the mouse to do scrolling. So it is OK to let up
on the mouse with the thumb, and use the thumb on
buttons 8 and 9 to scroll down and up.)
GUI FEATURES and OPERATION NOTES:
The **DeviceID ENTRY FIELD** is used to specify a device number
for the user's pointer device.
The DeviceID can often be determined simply by looking
at the **output of the 'xinput list' command**, which is shown
in a **SCROLLABLE TEXT** area on the GUI.
Sometimes it is not enough to look for a string like
'Type is MOUSE' or 'Type is TOUCHPAD' in the text area
to find the DeviceID number after an 'id=' string.
And sometimes there is not a distinguishing 'device name',
like 'USB Optical Mouse' nor a manufacturer name like 'Logitech'
followed by a word like 'Mouse'.
Also, if the user plans to assign a function to a button
(or other 'protrusion' or 'wire' of the pointer device),
it may not be clear what number that 'button' has been assigned.
In those cases, it is helpful to put a GUESS at a DeviceID
number in the DeviceID entry field, and click on the
** 'Test' BUTTON **. Then a window pops up and for any
motion of the mouse/pointer-device and for any action, like
a button press, text will appear in the 'Test' window to
indicate the event. Button presses will show a button number.
Hence you can determine button numbers for 'protuberances'
on the pointer devide.
Once you determine the DeviceID and have it entered in the
DeviceID field, you can press the ** 'GETmap' BUTTON ** and
the command
xinput get-button-map <DeviceID>
will be run and the output will show up in the text area to
the right of the 'Map-list' label on the GUI.
To change a number in the 'Map-list' string, click on a
RADIOBUTTON of the GUI, to choose a position number, from
1 to 24.
Then click on a line of the Functions LISTBOX, to assign
that function to the chosen position in the Map-list string.
The Map-list should immediately update on the GUI.
For example, a left-handed user might click on RADIOBUTTON 1
and click on 'functionForButton3(menu)' in the LISTBOX.
Then they would click on RADIOBUTTON 3 and click on
'functionForButton1(select)' in the LISTBOX.
When the user has set the Map-list string as desired,
they click on the ** 'SETmap' BUTTON ** on the GUI,
which runs the command
xinput set-button-map <DeviceID> <Map-list>.
The change to the actions of the pointer device should
take effect immediately. The user can test this out by
doing 'paste' operations or 'select' operations (or whatever)
from/to/in various X-windows of the user's desktop.
----
That's about it for the features of the GUI. Of course,
the 'Exit' button allows for exiting and closing the
'tkPointerSettings' GUI --- and the 'Help' button shows
this help.
The 'ColorMe' button is there just in case your friends
tell you that the GUI looks 'blah'. You can change the
window's 'palette' of colors to a color of their choosing.
A FEW MORE MAPPING EXAMPLES:
Of course, there is no point assigning functions to 'wires'
if the mouse was not made to have those 'wires'. For example,
the simple scroll-wheel mice usually only have 'wires'
1 through 5.
Click on the listbox to choose a function for a 'button'/'wire'.
If you want to disable a button, choose 'NoOperation'.
For example, if you want to disable the 'paste' operation of
the scroll-wheel on a scroll-wheel mouse, click on radiobutton
number 2 and click on 'NoOperation' in the listbox.
And, if you want to give button 8, say, the 'paste' capability,
click on radiobutton number 8 and click on 'functionOfButton2(paste)'
in the listbox.
MAKING THE CHANGES 'PERMANENT':
To make the changes permanent (for whenever you login to your
computing device), you can copy and paste the 'Map-list'
string into a script (or configuration file or whatever) to
make the settings 'permanent'.
There is plenty of information on the internet on how to
make the settings 'permanent' for your particular operating
system --- including a lot of information that you would best
ignore. How to separate the good info from the bad? That's an art.
Typically you might want to make a little two line script
that executes the 'xinput set-button-map' command with your
'device NAME' (NOT id number, which might change if devices
are added). Also supply the string of numbers from the 'Map-list'
that worked for you.
Then you can call on that script to execute ... from a login or shell
'run control' file --- such as
\$HOME/.bashrc or \$HOME/.bash_aliases or \$HOME/.profile or
\$HOME/.kshrc or ...
where \$HOME represents your home directory. Find information for
your operating system on which file is best to modify.
---
Another option is to set the 'tkPointerSettings' GUI script to
startup with your favorite string of numbers in the 'Map-list'.
Then you can simply click the 'SETmap' button after starting up
this GUI, to return to your favorite settings.
You could setup this Tk script as an icon on your desktop. Then
it would be simply a double-click (or right-click and choose Open)
on that icon to run this script whenever you want.
---
You can return to this GUI to make minor mapping changes
during a session --- for example, if you wanted to disable
the paste function of button-2 (a scroll wheel) for a while
--- or if you wanted to disable the scroll function provided by
'wires' 4-and-5 (of the scroll wheel), for a while.
---
The 'GETmap' button can be handy to replace the mapping string with the
settings that are currently active for the mouse. For example, you can
use GETmap when you first start up the GUI after logging in --- to see
what your mouse is currently set to do --- either because of config file
settings or log-in scripts, or by default, because none of those things exist.
"
##+######################################################
## Additional GUI INITIALIZATION:
##
## (This is for most of the APPLICATION-SPECIFIC initialization,
## such as widget VARIABLES --- NOT for widget PARAMETERS
## such as button padding or '-relief' settings.)
##+######################################################
##+##################################################
## Set a default value for the radiobuttons variable.
##+##################################################
set positionIDX 2
##+########################################
## Load the functions-for-buttons listbox.
##+########################################
loadfuncs2listbox
##+#####################################################
## Initialize the string in the .fRxinputparms.txtINPUT
## text widget --- to the sequence of integers 1-24.
##
## See the internals of this proc for statements that
## tailor the NUMSstring that appears on the GUI to
## a user's favorite mouse.
##+#####################################################
init_xinput_parms_array
THE OTHER BUTTONS
I described use of the 'SETmap', 'GETmap', and 'Test' buttons of the GUI above --- and more detail can be seen in the HELPtext variable of the code above.
Of course, the 'Exit' button exits this app and closes the GUI window, and the 'Help' button shows the text of the HELPtext variable in the code above.
But there is another button on the GUI --- the 'ColorMe' button.
The 'ColorMe' button is not essential. It is there just in case your friends tell you that the GUI looks 'blah'. You can change the window's 'palette' of colors to a color of their choosing. Example:
If you want to implement that button, it uses an 'external' Tk color-selector script whose code you can get from a page that I have provided on this wiki --- at A non-obfuscated color selector GUI.
SOME POTENTIAL ENHANCEMENTS:
I actually do not have any plans for further enhancements for this GUI, but I have recently purchased several 'pointer devices' --- both for testing this utility, and for replacing the mice that I use on my main desktop and netbook computers with a mouse by which I can more easily do 'text swipe-and-paste' operations. The scroll-wheels on my current mice make that nice Unix-era operation a frustration, as the paste often causes the scroll-wheel to rotate and move the text in an editor window when I did not want to scroll the text.
I even bought a 'SteelSeries 3GC Controller - USB Rumble PC Controller' --- for only $20 at Walmart. This is actually a game controller, but I thought I would try testing out how it would do as a mouse replacement.
If testing goes OK, I may replace the mice on my desktop and netbook computers with mice that have additional buttons that I can map to the 'paste' function. Mice like
- the Logitecth M500 Corded Mouse (corded for less electro-magnetic interference)
or
- the Logitech M510 Wireless Mouse.
I may update the code posted here if I find I need some enhancements in dealing with these 'pointer devices'.
By the way, I have not tested this Tk GUI in mapping functions of a 'touchpad'. I find touchpads too counter-productive for use in code development, so I never use them. But if anyone tries using this utility for re-mapping functions of a touchpad, and if they discover any useful information, they could post their experiences here.
IN CONCLUSION
There's a lot to like about a utility that is 'free freedom' --- that is, no-cost and open-source so that you can modify/enhance/fix it without having to wait for someone else to do it for you (which may be never).
I hope to provide more 'user-friendly, useful utilities' --- UUU's --- done with Tk scripts. ('useful' and 'utility' may seem redundant, but I think those words are worth repeating.) As I have said on several other code-donation pages on this wiki (and this also bears repeating) ...
A BIG THANK YOU to Ousterhout for starting Tcl-Tk, and a BIG THANK YOU to the Tcl-Tk developers and maintainers who have kept the simply MAH-velous 'wish' interpreter going.
uniquename 2013aug25-to-28 update - with info on Logitech M500 (and M510) mouse
I have been using a Logitech M500 mouse for a day now with a couple of button-mapping experiments. I have found a 'pretty good' mapping to support the fast text 'swipe-with-MB1-and-paste-with-MB2' that I find so productive. You can see the couple of mappings that I have tried in the 'init_xinput_parms_array' proc in the code above.
I replaced the code above --- with the changes in that proc --- and with some spelling corrections in the 'HELPtext' variable. I also added some text in the HELPtext variable that explains what I did for the Logitech M500 mouse. In the following image of the M500, you can see the two buttons on the side of the mouse (buttons 8 and 9) that I am mapping.
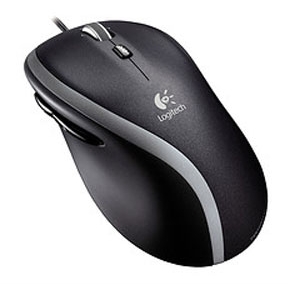
Here is an extract from that HELPtext:
                                       ... for those who like
      a quick swipe-and-paste operation with buttons 1 and 2,
      where 2 is a scroll wheel ... :

      Deactivate the scroll up and down functions of
      'buttons' 4 and 5 (so that button 2, the scroll wheel,
      is just used for paste, not scroll) --- and re-assign the
      scroll up and down functions of the scroll wheel
      to side (thumb) buttons 9 and 8, respectively.

      (This works better for text pasting, because we need
       the thumb to hold the mouse down firmly while we do the
       paste with the index finger pressed on the scroll wheel.
       We do not need this precise, held-steady positioning
       of the mouse to do scrolling. So it is OK to let up
       on the mouse with the thumb, and use the thumb on
       buttons 8 and 9 to scroll down and up.)
This mapping --- which is '1 2 3 0 0 6 7 5 4 10 11 ...' for righties --- or '3 2 1 0 0 6 7 5 4 10 11 ...' for lefties --- would also work for the Logitech M510, which is the wireless version of the M500.
However, this is not an ideal solution, for at least a couple of reasons:
- I no longer have the 'auto-repeat' (FAST notched or smooth) scrolling that I had with the mouse wheel.
- Pasting with the mouse wheel is not very satisfying because the wheel tends to roll when I press down on it. Although I have de-activated the scroll up/down function, it is not a pleasant feeling for the paste button to be rolling when I paste.
I may look into using a mouse on which there are one or more extra buttons ON TOP OF the mouse, that I can make a 'paste' button.
The following image shows a 'Steelseries World of Warcraft' mouse ('Cataclysm Edition') with a couple of buttons on top of the mouse in white circles.
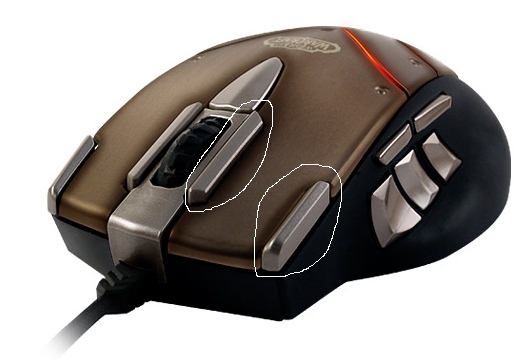
I may try that mouse and use one of those top buttons for paste --- which would allow me to use the scroll-wheel for scrolling --- instead of the side/thumb buttons that I am using for repeated-button-press scrolling on the Logitech M500.
I looked for this mouse in local stores but could not find it. However, I found the Steelseries World of Warcraft Legendary Edition mouse which has a couple of buttons just behind the scroll wheel, and a button on the right of the mouse, that might be mappable to a paste operation. See the following 2 images. (Buttons 9 and 11 look like the best candidates for a paste operation. In fact, I could make both of those buttons function as 'paste' buttons. In the manual that comes with the mouse, those 2 buttons are called the 'World Map' and 'Zone Map' buttons.)
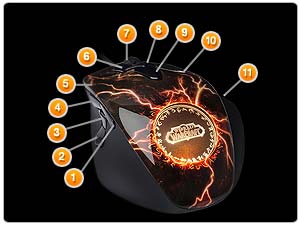

And there are four buttons on the left of the 'Legendary Edition' mouse, with one of the buttons being located low enough that one might be able to press the button without moving the mouse. See the image below --- for the 4 'thumb' buttons that are labelled 1, 2, 3, and 4 in the 11-button image above.

I may try out this mouse and report back here.
There are plenty of mice with 'additional top buttons' that I can try, such as the Logitech G300 or G500 or G700 gaming mice (images follow).


And there are other brands with 'additional top buttons', such as:
Corsair Vengeance M90.
Razer Mamba wireless.
Sunsonny SM-SG80.
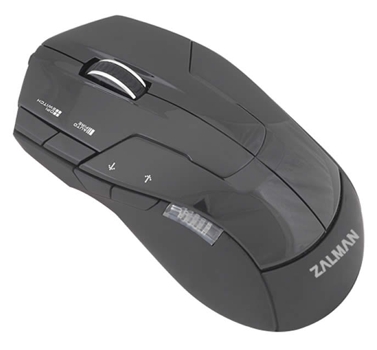
Zalman ZM-M300 wired.

Cooler Master (CM) Storm Inferno
Shogun Brothers Ballista MK-1 Pro

Genius GX Gila (with 4 extra buttons on the left and right of top of mouse that might be usable for a 'paste' operation)
Genius GX Deathtaker (with 2 buttons on the left and one on the right of the top of the mouse that might be usable for a 'paste' operation)

Rude Gameware Fierce 230 (with 2 extra buttons on the top left)
OCZ Equalizer --- Unfortunately, the red extra button on the top of this mouse is a 'triple-fire' button. If one were to map it to a 'paste' operation, it would probably do 3 pastes per button press, instead of just one.
In fact, I experienced something similar in trying to map the 'left-tilt' of the scroll wheel to a 'paste' operation, on a Microsoft 4000 Wireless Mobile mouse. The left and right tilt of the scroll wheel acts in an auto-repeat fashion. So when I mapped the tilt to do a paste, it would rapidly do 2 or 3 pastes, usually, before I released the tilt of the scroll wheel. If I could somehow disable or slow down the auto-repeat, then I could probably use the left-tilt to do 'text-pastes'.
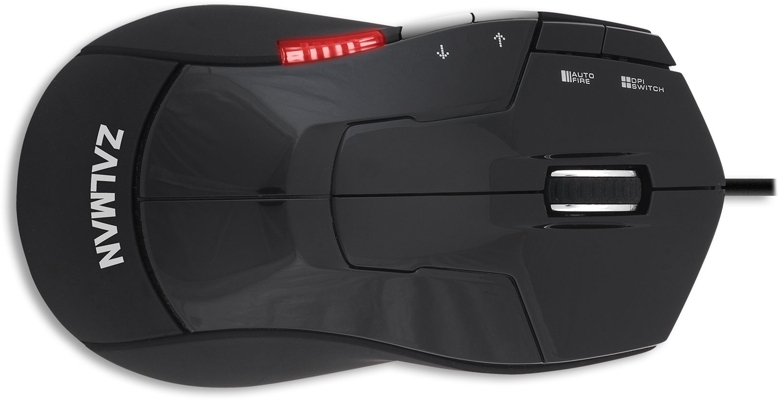
Similarly, this clearer image of the Zalman ZM-M300 that was shown above, shows that one of the two buttons on the top left is an 'AutoFire' button. So if you tried to map that button to a 'paste' operation, it would probably do several pastes before you could release the button. And there is probably no easy way to control the time interval between 'shots'.
Furthermore, the other button is labeled 'DPI'. Like on some other mice, it is probably not available for mapping. It is probably hard-wired to control the sensitivity of the scroll wheel or the optics.
Those two buttons with left and right arrows near them, might be close enough to the top of the mouse that one could press DOWN on them with an index finger rather than SIDEWAYS with the thumb. If one could do that (to avoid moving the mouse while doing the button press), then one (or both) of those buttons could perhaps be mapped to a 'paste'.
_______________
Thumb buttons for 'paste'
There used to be a Logitech mouse on which the button on the left side of the mouse was BELOW where the (right-handed person's) thumb rests --- the Logitech 'Mouseman Dual Optical' (image below).

Unfortunately, Logitech no longer makes a mouse like that. In fact, in one old web post that I saw, a fellow described trying a newer Logitech mouse, but he went back to the 'Mouseman Dual Optical' because he experienced what I experienced --- when the buttons are ABOVE the thumb, the mouse tends to move around when you move the thumb UP to press on the button.
Among images of newer mice that I have seen, the following two mice may have 'thumb-buttons' low enough so that the mouse does not move around when you press on the button.

Thermaltake TT Esports Volos (You might be able to press the green button without the mouse moving.)
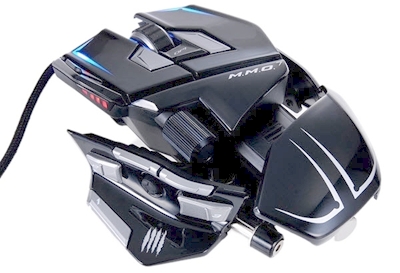
Mad Catz Cyborg MMO7 (That silver object in the lower left of this image may be a button that would be positioned BELOW where the thumb usually rests. If that would not work, it looks like there are several buttons on TOP of the mouse, near the scroll wheel and at the upper left of this picture, which might be mappable to a paste operation.)
If I finally settle on a mouse and mapping, then I may try experimenting with the Steelseries 3GC game controller:
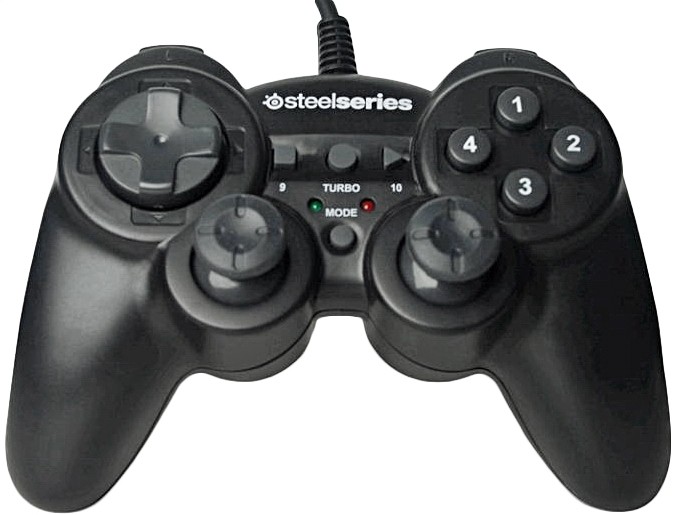
What can I make this baby do? Control a robot through my computer --- to open the refrigerator door and bring me a beer? Or perhaps control my PD from my PC --- my Personal Drone from my Personal Computer.
uniquename 2013sep09 update - with info on Logitech G300 mouse
After using a Logitech M500 mouse for about a week, with the button mapping that used the scroll-wheel for 'paste' and moved the scroll up/down functions to the 2 side buttons, I found that I did not like the feel of the wheel rolling when I did a 'paste' --- and I missed the fast-scroll that I had with the scroll wheel.
The Logitech G300 mouse looked like my best bet for a next attempt --- in a mouse costing less than $40. I could not find the G300 in local 'box' stores, so I sent off for one. An image showing the top buttons follows.
I plugged this mouse into my desktop computer and started up the 'tkPointerSettings' GUI. It showed this mouse with name "Logitech Gaming Mouse G300" and with id=8.
I put 8 in the 'Device ID:' entry field and clicked the 'Test' button. In the window that popped up, whenever I clicked on the 2 left buttons of the G300, they were revealed to be buttons 8 and 9.
A rather strange thing about this mouse: When I clicked on the 2 right buttons, they did not show as anything in the 'Test' window. Their functions seem to be 'hard-wired' into the mouse.
There is a 'profile' button in the middle of the mouse that can be used to switch among 3 different 'profiles' for the left and right buttons. Which profile is active is indicated by a color strip of light on the left and right sides of the mouse --- red, green, or blue.
In the 'blue' profile, the 2 right buttons issue a Ctl-C or Ctl-V command. This Ctl-C is still not as nice as the 'swipe-with-MB1-down' kind of copy that I want to be able to do, trouble-free.
So I would like to de-activate the 2 right buttons. But with no button numbers --- known to 'xinput' --- with which to map them to zero (no-operation), I do not have a way of de-activating the right buttons. I will just have to be careful not to press them at a bad time.
To cut this presentation short, I ended up using the mapping '1 0 3 4 5 6 7 2 2 10 11 ...' --- which de-activates the 'paste' operation of the scroll-wheel and causes buttons 8 and 9 to act as 'paste' buttons.
If the G300 does not work out, then I may try the Steel Series 'Legendary Edition' mouse, pictured above.
The Mad Catz Cyborg R.A.T. 7 mouse was on sale at BestBuy here last week for $80. It has nice customization features like the ability to change the length of the mouse, as seen in the following image.
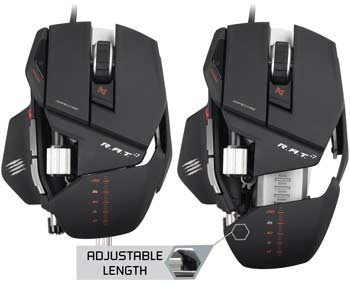
But all I need is a mouse with ONE extra button on TOP of the mouse, in an easily reached location, which I can map to the 'paste' operation. The 'Legendary Edition' mouse costs a little less than the RAT7, at Walmart. I think I will try that before the RAT7. They both get similar, mixed reviews on amazon.com.
I also have a Logitech marble mouse with a couple of extra buttons on the top --- that I got to use with one of my netbook computers, when I am in a place (like an airport) where I do not have a flat surface to work on. See image below.

I can try the M570 if the G300 and the Legendary-Edition do not work out.
By the way, I have changed the code above to include the mapping for the G300 mouse in the 'init_xinput_parms_array' proc.
I also made a small fix to the proc for the 'GETmap' button --- so that it changes an internal array holding the button settings, as well as changing the button mapping string shown on the GUI.
The 'GETmap' button can be handy to replace the mapping string with the settings that are currently active for the mouse. For example, you can use GETmap when you first start up the GUI after logging in --- to see what your mouse is currently set to do --- either because of config file settings or log-in scripts, or by default, because none of those things exist.
More later.